Friday, December 10, 2010
Friday, September 24, 2010
Montage Project

So, this montage is about a Nuclear Bomb that has been dropped by these two airplanes in a little town. The story for this montage is these airplanes come into this little town in the middle of nowhere and they dropped a nuclear bomb right on top of it destroying everything that existed in the little town. So, the reason I chose these pictures for this montage is because the sadness they have left the people that have survived the bomb. Also, the reason why I put a guy with the gas mask in there is because people and the government are going to need to use one of those in order to survive the nuclear chemicals that are airborne. The only way I was able to accomplish this montage was the layer mask tool.

Montage Project

So, this montage is about a Nuclear Bomb that has been dropped by these two airplanes in a little town. The story for this montage is these airplanes come into this little town in the middle of nowhere and they dropped a nuclear bomb right on top of it destroying everything that existed in the little town. So, the reason I chose these pictures for this montage is because the sadness they have left the people that have survived the bomb. Also, the reason why I put a guy with the gas mask in there is because people and the government are going to need to use one of those in order to survive the nuclear chemicals that are airborne. The only way I was able to accomplish this montage was the layer mask tool.

Friday, August 27, 2010
Tutorial #138

In this tutorial #138 there was a step that was really challenging to me. I had to use the pen tool and draw a four pointed star which took me a while to do. The rest of the steps were pretty easy for me and I did not have any problems with. One of the techniques I learned in this tutorial which is how to make a four pointed start while using the pen tool. Another technique I learned was how to move the shape that I drew form being horizontal to diagonal.
Tutorial #7

In this tutorial #7 there are a couple things I would like to share with you. One of them is that I had trouble on one of the steps which was the Highpass tool. I had trouble with this tutorial because I had to keep changing my picture in order for this tool to work. Besides that step the rest of the steps were pretty easy for me. One of the techniques I learned from this tutorial was how to use the Highpass tool.
Tutorial #28

So on this tutorial #28 I learned how to make a perfectly colored picture look older. There was a step that I thought were hard in this tutorial. One of them was how to change an index into a layer. Besides that step the rest of them were pretty easy for me. One of the techniques I learned from the tutorial was how to make a index into a layer.
Tutorial #45

On this tutorial #45 was pretty fun because I made a fog effect on my picture. There are a couple hard parts of this tutorial that I will tell you about. One of them is the pen tool. The pen tool was hard for me because I had to make a certain shape or the fog effect would not look right in the picture. Also another step that was hard was the Direct Selection Tool which I had to make a shape to cut a piece off the pen tool to make the shape that I drew better. One of the steps that were easy for me was the Gaussian Blur tool. There are two techniques I learned from this tutorial which were, how to use that pen tool and the Direction Selection Tool.
Wednesday, August 25, 2010
Tutorial #84

In this tutorial I got taught how to make a barcode. In this tutorial there were no specific things that were hard or challenging to me. There were a few things that I thought were easy which the color of the foreground and background. Another easy reason is the apply noise tool. Some of the techniques I learned were the noise ability and tool.
Tutorial #196

Some of the things that were hard about this tutorial were the lasso tool. The lasso was hard because I have to make the lines as straight as possible or the part that I’m trying to lasso would look very bad. Also another thing that was hard was that I had to make a certain size for the picture to work. Also, there are some easy things about this tutorial I will share with you. One of the reasons was how to change the color of the area that has the lasso tool on the picture to make the ground look like grass. One of the techniques that I learned in this tutorial were how to make a lasso area a different color.
Tutorial #43

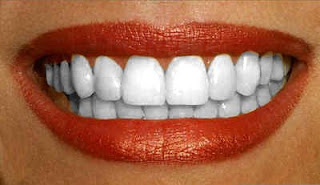
The things that I thought were hard about this tutorial was the lasso tool. What was hard about the lasso tool was that the lines that you make with the lasso have to be as straight as possible or there would be parts of the teeth that ae not colored in fully. Also, another reason I thought this tutorial was hard was because I couldn't make a backround into a layer. Also, there were some easy parts about this tutorial. One of them were that I had to desaturate the picture. One of the techiques I learned was how to turn a backround into a layer.
Monday, August 16, 2010
Monday, July 26, 2010
My first impressions in Computer Art.
My first impressions in Computer Art were that I was going to be making programs or things in that nature. Also, when i walked into the class i thought it was going to be boreing but it turned out to be really cool. Like we were able to wach a couple videos on how they use photoshop and how that program works. My teacher is explaining that in the future we are going to use photoshop and use digital pictures for our work and projects. Also, when we use photoshop we are going create different kinds of pieces of art. So, i really hope that this class will be very fun and exciting!
Subscribe to:
Comments (Atom)


